
How we bring your natural stone floor tiles back to life
Natural stone flooring is one of the most beautiful and enduring features you can introduce into a property. Whether it’s polished marble in a hallway, limestone in a kitchen, granite in a commercial reception area, or terrazzo in a period building, stone delivers character and timeless appeal in spades.
But unlike synthetic flooring, natural stone really is a living material. It reacts to foot traffic, cleaning products, moisture, spills, and general wear. Over time, even the highest-quality stone can lose its lustre.
At Paul Dyson Floor Care Cleaning Specialists, restoring natural stone isn’t about a quick clean. It’s a carefully controlled, technically correct process designed to protect, repair, and enhance your floor for the long term. And here’s exactly how we do it.
Why stone needs more than regular cleaning
One of the biggest misconceptions about natural stone floor tiles is that routine mopping is enough to maintain them. While regular maintenance is important, it doesn’t address what’s happening beneath the surface.
Most natural stone is porous to some degree. That means it can absorb moisture, oils, and residues over time. In busy households, grit brought in on shoes acts like sandpaper, slowly abrading the surface. In kitchens and bathrooms, splashes and spills can leave subtle staining or etching, especially on calcium-based stones such as marble and limestone.
Worse still, many everyday cleaning products are simply not designed for stone. Acidic solutions, bleach-based products or strong detergents can gradually break down the surface. Even excessive water can draw minerals into the stone, leaving dull patches.
When a floor starts to lose its uniform finish or develops uneven shine, the problem usually lies within the top microscopic layer of the stone itself. That’s where professional mechanical refinement becomes essential.
Understanding your stone: why identification matters
Before we begin any restoration, the first step is identifying exactly what type of stone we’re working with. This might sound straightforward, but it’s critical.
Marble and limestone, for example, are both calcium-based and relatively soft compared to granite. They’re prone to etching from acidic substances and require a specific polishing process to restore their finish correctly. Limestone is also more porous, meaning sealing becomes particularly important after restoration.
Granite is much harder and more resistant to scratching, but that doesn’t mean it won’t dull over time. It requires a different diamond process to refine and polish effectively.
Terrazzo presents its own challenges. As a composite of marble chips set within a cement or resin binder, it must be ground and polished evenly to ensure both materials are restored consistently.
Travertine often contains natural holes that may need filling, while slate and sandstone require techniques suited to their textured surfaces.
Using the wrong system on the wrong material can permanently damage a floor. Correct classification allows us to choose the appropriate abrasives, polishing compounds and sealers for long-term success.
The step-by-step restoration process
Every floor is slightly different, but the underlying restoration process follows a carefully controlled sequence. Here’s a quick breakdown of how we handle our natural stone restorations.
1. Inspection & assessment
We begin with a thorough inspection. Our team will assess the stone type, the level of wear, previous treatments, staining, grout condition and any structural damage such as cracks or chips. This stage determines how aggressive the initial grinding needs to be and whether repairs are required before surface refinement.
2. Repairs
Natural stone is durable, but it can develop imperfections over time. Small cracks, edge chips, and surface holes, particularly common in travertine and some limestones, can detract from the appearance and allow further deterioration if left untreated.
We carry out colour-matched repairs using specialist fillers designed specifically for stone. These repairs restore structural integrity while blending seamlessly into the surrounding material. Addressing these imperfections before polishing ensures the final result is smooth and visually cohesive.
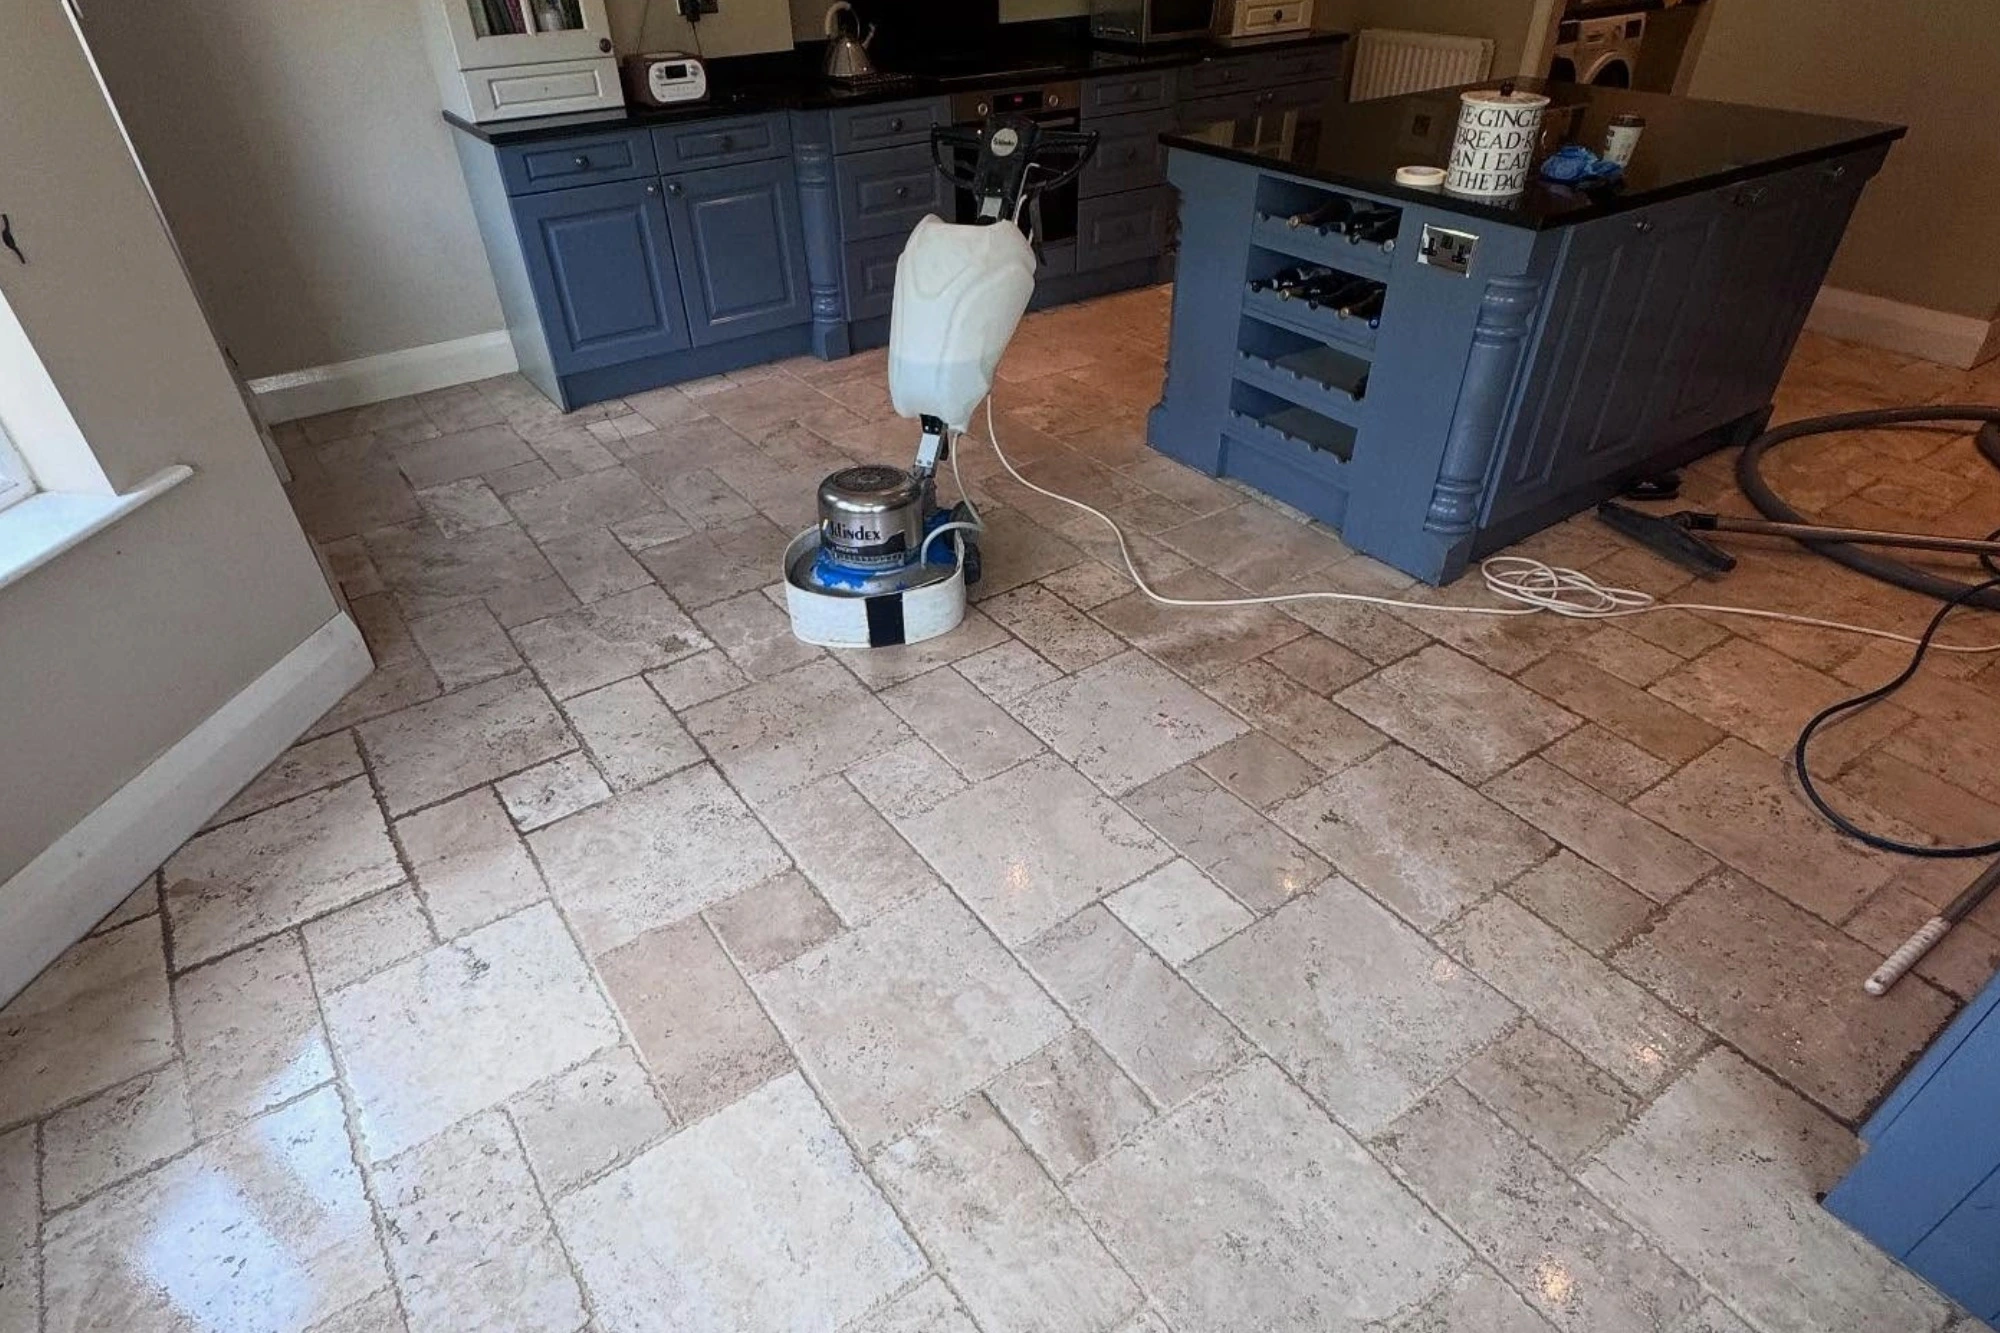
3. Grinding & honing
If a floor is heavily scratched, uneven, or suffering from deep etching, we begin with diamond grinding. This process removes a very fine layer from the surface, eliminating damage and creating a level base.
Using professional-grade machinery and progressively finer diamond abrasives, we refine the stone step by step. Each stage reduces scratch patterns left by the previous grit. This process, known as honing, gradually smooths and prepares the surface for polishing.
For floors with lippage (where adjacent tiles sit at slightly different heights) grinding can also level these inconsistencies, dramatically improving both appearance and safety.
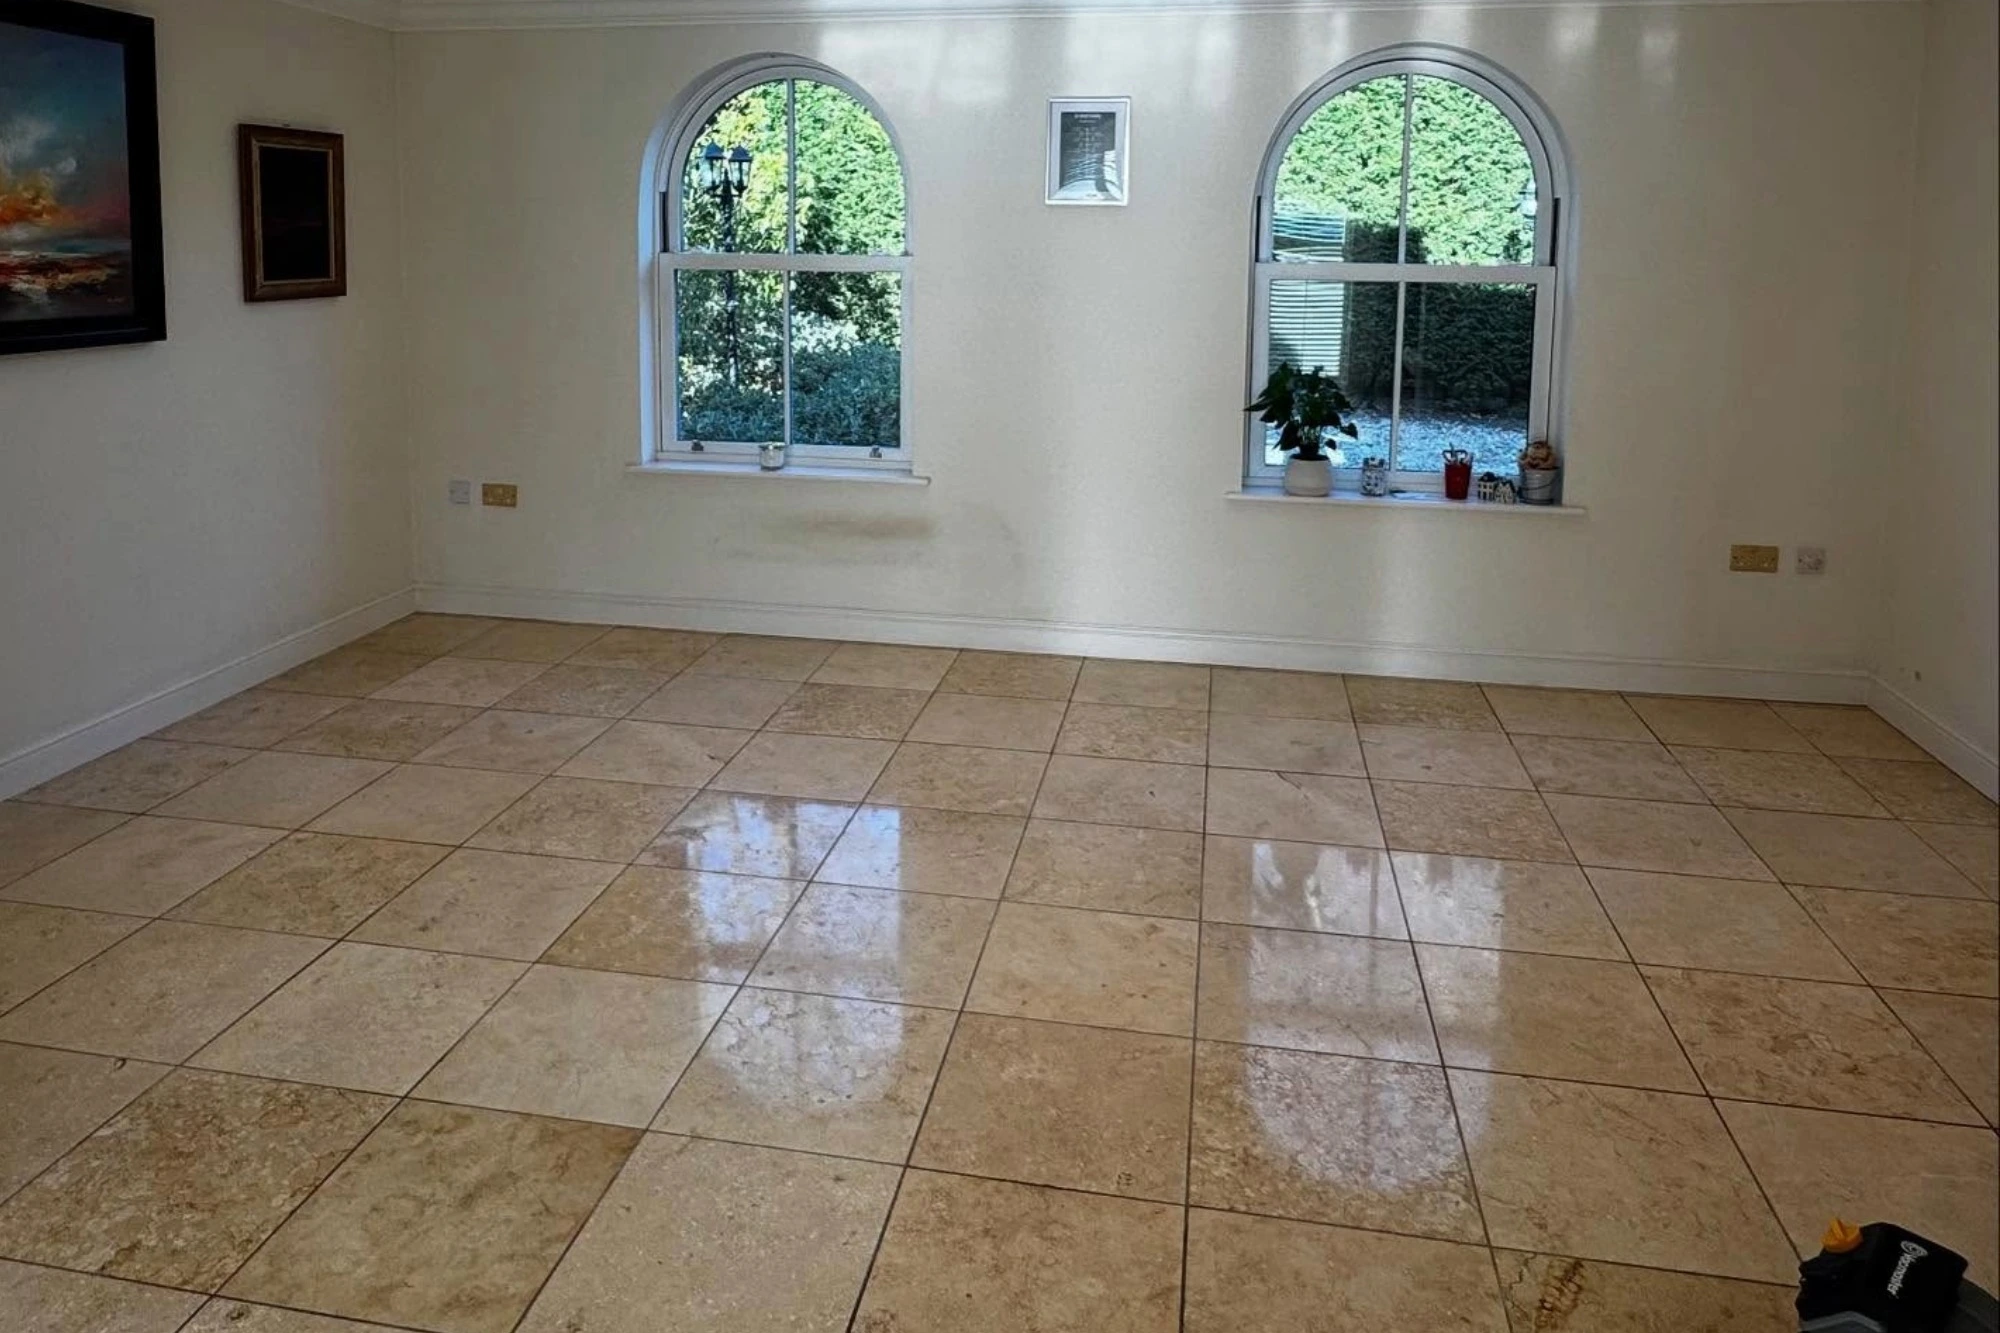
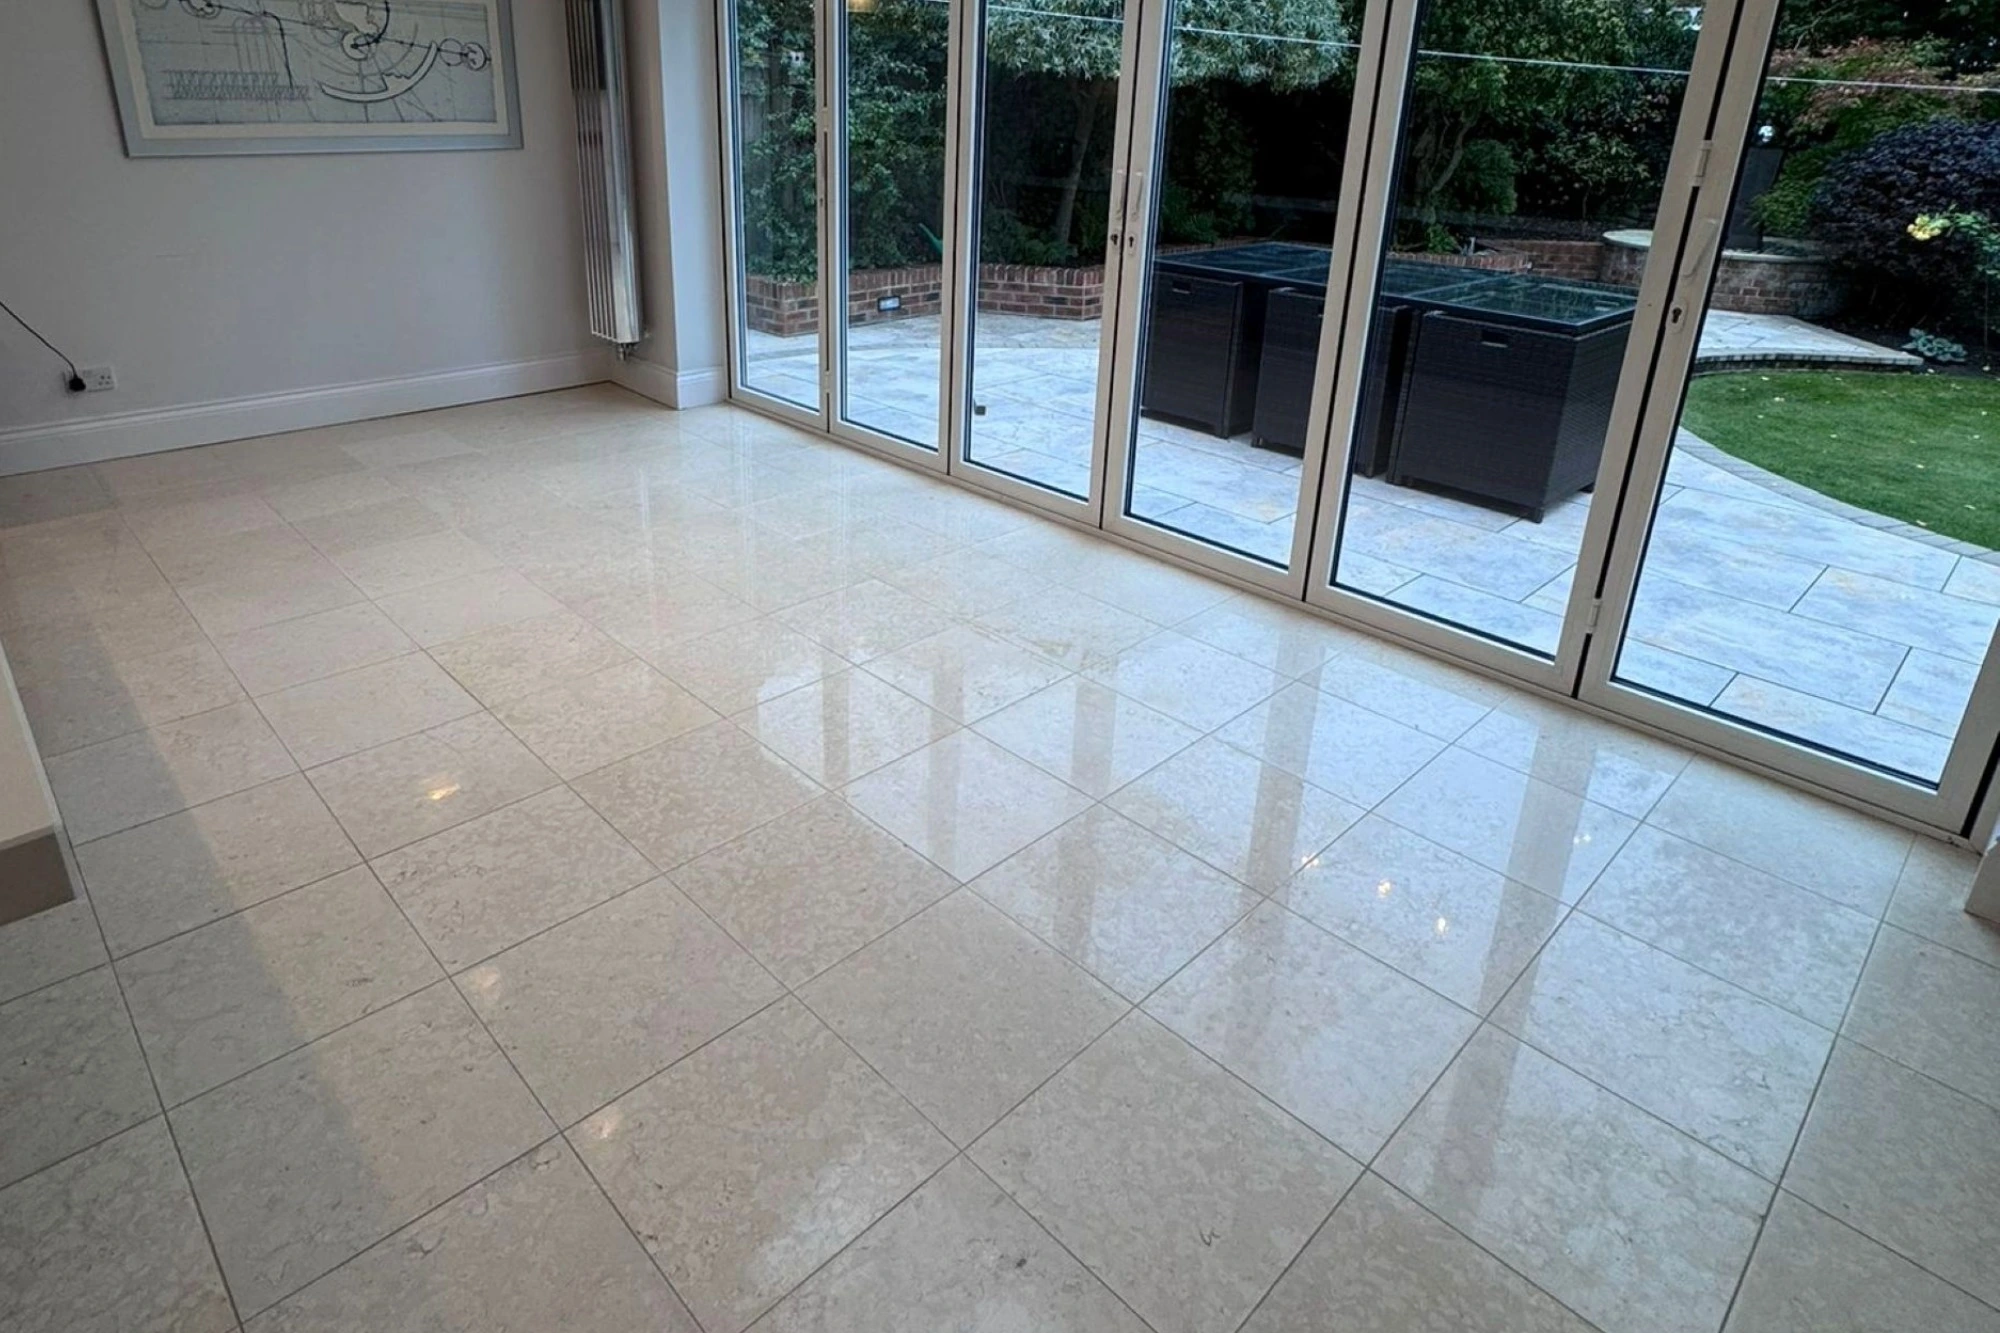
4. Polishing & refinement
Once honed to the appropriate level, the stone is polished to achieve the desired finish. Some clients prefer a natural satin look, while others want a higher gloss that reflects light and enhances colour depth.
Polishing is about more than just looks. It tightens the surface structure, making it less prone to dirt retention and easier to maintain. On softer stones such as marble and limestone, we often use advanced diamond polishing systems to achieve clarity and depth without over-processing the material.
5. Specialist grout cleaning
Grout lines can dramatically affect the overall appearance of a floor. Even if the stone looks refreshed, dark or stained grout will undermine the result.
As part of the restoration process, we carry out deep grout cleaning to remove embedded dirt and discolouration. Where necessary, grout repairs or recolouring can be undertaken to create a crisp, consistent finish across the entire installation.
The importance of sealing and long-term protection
Once the stone has been restored, sealing becomes essential. Stone is naturally absorbent. Without protection, liquids can penetrate the surface and cause staining. Proper sealing reduces absorption, helping prevent oil marks, mineral deposits and premature dulling. It also makes routine cleaning significantly easier.
We select the type of sealer based on the stone and the environment in which it’s installed. For example, impregnating sealers penetrate beneath the surface, protecting from within while maintaining the stone’s natural appearance. These are particularly suitable for kitchens, hallways and other high-traffic areas.
On the other hand, colour-enhancing sealers are designed to deepen and enrich natural tones, bringing out veining and variation. They’re popular where clients want to intensify the stone’s character.
In certain applications, topical sealers can be used to provide an additional surface layer of protection. These may slightly alter sheen and are chosen carefully depending on location and usage.
Choosing the correct sealer is just as important as the restoration itself. The wrong product can alter appearance or create maintenance issues. The right one preserves both beauty and durability.
Safety and slip considerations
Polished stone can become slippery, particularly in wet areas or commercial settings. Safety is not something that should be overlooked.
We can assess slip resistance and advise on improvements where necessary. In busy environments such as reception areas, restaurants or bathrooms, ensuring appropriate traction can even be a matter of compliance and liability. Therefore, balancing looks with adequate safety is part of simply delivering a complete professional service.
Maintaining your stone floor between treatments
Professional restoration might set the tone, but correct maintenance keeps it looking its best. The most important rule is to use pH-neutral, stone-safe cleaning products. Harsh chemicals and acidic solutions should be avoided entirely. Steam mops are also unsuitable, as excessive heat and moisture can compromise sealers over time.
Spills should be wiped promptly, particularly on lighter stones. Entrance mats help reduce grit being walked across the surface, and protective pads beneath furniture prevent scratches.
When maintained correctly, a professionally restored and sealed natural stone floor can retain its finish for years before further mechanical refinement is required.
Knowing when it’s time to call the professionals
It’s not always obvious when natural stone floor tiles need more than routine cleaning. However, certain signs indicate that professional restoration is required.
If the surface remains dull no matter how much it’s cleaned, if visible etching appears in certain lights, or if there are deep scratches that won’t disappear, the issue is almost certainly beneath the surface. Persistent staining, cracked tiles, visible holes, or uneven shine are also strong indicators.
In these situations, DIY methods can often make matters worse. Professional mechanical restoration removes damage at a microscopic level and restores the integrity of the stone properly and safely.
Bringing stone back to life with Paul Dyson
When natural stone is restored correctly, the transformation can be remarkable. And this is something we’ve seen time and time again with previous projects. Colours regain depth. Veining becomes more pronounced. Light reflects evenly again. The floor feels solid, smooth and refined underfoot.
At Paul Dyson Floor Care Cleaning Specialists, we combine decades of hands-on experience with advanced machinery, specialist training and carefully selected sealing systems. From repairing cracks and filling holes to precision grinding, diamond polishing and tailored sealing, our approach is methodical and technically precise.
Most importantly, we treat every floor as an investment worth protecting, not just cleaning. If your natural stone tiles have lost their clarity, developed wear patterns or simply need expert assessment, we’d be delighted to help. Contact our team to arrange a professional survey and discover how we can bring your natural stone floor tiles back to life.
Share this article: